
Cacti is an open-source, web-based network monitoring and RRDTool-based Graphing Solution. Compared to MRTG, Cacti stores information in a MySQL database to create graphs and populate data. It was designed to monitor and collect data about network or system devices.
Tested Platform (it should work with other older or later versions as well, recommended to use the source file instead of doing it via “apt install”.
-Ubuntu 16.04.7 LTS (GNU/Linux 4.4.0-169-generic x86_64)
– Cacti Server v1.2.16 (latest as at the time of writing)
-PHP 7.0
-Apache/2.4.18
-MySQL (10.0.38 MariaDB)
-Cisco UCS (Hardware)
Steps on Cacti Installation and Configuration on Ubuntu Server:
1. Update Server and default packages
sudo apt update && sudo apt upgrade
Sample Output:
tux@labucs1:~$ sudo apt update && sudo apt upgrade
[sudo] password for tux:
Get:1 http://security.ubuntu.com/ubuntu xenial-security InRelease [109 kB]
Hit:2 http://sg.archive.ubuntu.com/ubuntu xenial InRelease
Get:3 http://sg.archive.ubuntu.com/ubuntu xenial-updates InRelease [109 kB]
Hit:4 http://us.archive.ubuntu.com/ubuntu xenial InRelease
Reading package lists… Done
2. Install Apache Webserver (with PHP module)
sudo apt install apache2 libapache2-mod-php
Sample Output:
tux@labucs1:~$ sudo apt install apache2 libapache2-mod-php
The following additional packages will be installed:
libapache2-mod-php7.0 php-common php7.0-cli php7.0-common php7.0-json php7.0-opcache php7.0-readline
Suggested packages:
php-pear
The following packages will be REMOVED:
php5-cli php5-readline
The following NEW packages will be installed:
libapache2-mod-php libapache2-mod-php7.0 php-common php7.0-cli php7.0-common php7.0-json php7.0-opcache
php7.0-readline
0 upgraded, 8 newly installed, 2 to remove and 3 not upgraded.
Need to get 3,474 kB of archives.
After this operation, 4,591 kB of additional disk space will be used.
Do you want to continue? [Y/n]
Creating config file /etc/php/7.0/apache2/php.ini with new version
apache2_invoke: Enable module php7.0
Setting up libapache2-mod-php (1:7.0+35ubuntu6.1) …
3. Install MariaDB Database
sudo apt install mariadb-server mariadb-client
Sample Output:
tux@labucs1:~$ sudo apt install mariadb-server mariadb-client
The following packages will be REMOVED:
mysql-client mysql-client-5.7 mysql-client-core-5.7
The following NEW packages will be installed:
mariadb-client mariadb-client-10.0 mariadb-client-core-10.0 mariadb-common mariadb-server mariadb-server-10.0
mariadb-server-core-10.0
0 upgraded, 7 newly installed, 3 to remove and 3 not upgraded.
Need to get 14.5 MB of archives.
After this operation, 75.5 MB of additional disk space will be used.
Do you want to continue? [Y/n]
Processing triggers for ureadahead (0.100.0-19.1) …
Setting up mariadb-client-core-10.0 (10.0.38-0ubuntu0.16.04.1) …
Setting up mariadb-client-10.0 (10.0.38-0ubuntu0.16.04.1) …
Setting up mariadb-server-core-10.0 (10.0.38-0ubuntu0.16.04.1) …
Setting up mariadb-server-10.0 (10.0.38-0ubuntu0.16.04.1) …
Setting up mariadb-client (10.0.38-0ubuntu0.16.04.1) …
Setting up mariadb-server (10.0.38-0ubuntu0.16.04.1) …
Processing triggers for systemd (229-4ubuntu21.29) …
Processing triggers for ureadahead (0.100.0-19.1) …
4. Install PHP packages and extensions
sudo apt install php php-mysql php-snmp php-xml php-gd php-ldap php-curl php-mbstring php-common php-gmp
Sample Output:
tux@labucs1:~$ sudo apt install php php-mysql php-snmp php-xml php-gd php-ldap php-curl php-mbstring php-common php-gmp
The following additional packages will be installed:
php7.0 php7.0-curl php7.0-gd php7.0-gmp php7.0-ldap php7.0-mbstring php7.0-mysql php7.0-snmp php7.0-xml
The following NEW packages will be installed:
php php-curl php-gd php-gmp php-ldap php-mbstring php-mysql php-snmp php-xml php7.0 php7.0-curl php7.0-gd
php7.0-gmp php7.0-ldap php7.0-mbstring php7.0-mysql php7.0-snmp php7.0-xml
0 upgraded, 18 newly installed, 0 to remove and 3 not upgraded.
Need to get 838 kB of archives.
After this operation, 3,104 kB of additional disk space will be used.
Do you want to continue? [Y/n]
Creating config file /etc/php/7.0/mods-available/xsl.ini with new version
Setting up php-xml (1:7.0+35ubuntu6.1) …
Processing triggers for libapache2-mod-php7.0 (7.0.33-0ubuntu0.16.04.16) …
5. Install SNMP and RRDTool
sudo apt install snmp snmpd rrdtool librrds-perl snmp-mibs-downloader
Sample Output:
tux@labucs1:~$ sudo apt install snmp snmpd rrdtool librrds-perl snmp-mibs-downloader
The following additional packages will be installed:
libdbi1 librrd4 smistrip
Suggested packages:
snmptrapd
The following NEW packages will be installed:
libdbi1 librrd4 librrds-perl rrdtool smistrip snmp snmp-mibs-downloader snmpd
0 upgraded, 8 newly installed, 0 to remove and 3 not upgraded.
Need to get 5,923 kB of archives.
After this operation, 8,476 kB of additional disk space will be used.
Do you want to continue? [Y/n] y
6. Tuning of Database
a. Backup and Configure:
sudo cp /etc/mysql/mariadb.conf.d/50-server.cnf /etc/mysql/mariadb.conf.d/50-server.cnf.ORIG
sudo vi /etc/mysql/mariadb.conf.d/50-server.cnf
Sample Output:
tux@labucs1:/etc/mysql/mariadb.conf.d$ sudo cp 50-server.cnf 50-server.cnf.ORIG
tux@labucs1:/etc/mysql/mariadb.conf.d$ sudo vi /etc/mysql/mariadb.conf.d/50-server.cnf
Before: (/etc/mysql/mariadb.conf.d/50-server.cnf)
# this is only for the mysqld standalone daemon
[mysqld]
#
After: (/etc/mysql/mariadb.conf.d/50-server.cnf) (Customize as per user requirements)
# this is only for the mysqld standalone daemon
[mysqld]
collation-server = utf8mb4_unicode_ci
max_heap_table_size = 128M
tmp_table_size = 128M
join_buffer_size = 64M
innodb_file_format = Barracuda
innodb_large_prefix = 1
innodb_buffer_pool_size = 512M
innodb_flush_log_at_timeout = 3
innodb_read_io_threads = 32
innodb_write_io_threads = 16
innodb_io_capacity = 5000
innodb_io_capacity_max = 10000
innodb_buffer_pool_instances = 21
Save and quit (:wq!)
b. Restart MariaDB
sudo systemctl restart mysql
Sample Output:
tux@labucs1:/$ sudo systemctl restart mysql
tux@labucs1:/$
7. Create Cacti database and grant permission to “cactiuser” with “password” as password. (Recommended to use strong password). After that , flush privileges.
sudo mysql -u root -p
tux@labucs1:/$ sudo mysql -u root -p
Enter password:
Welcome to the MariaDB monitor. Commands end with ; or \g.
Your MariaDB connection id is 32
Server version: 10.0.38-MariaDB-0ubuntu0.16.04.1 Ubuntu 16.04
Copyright (c) 2000, 2018, Oracle, MariaDB Corporation Ab and others.
Type ‘help;’ or ‘\h’ for help. Type ‘\c’ to clear the current input statement.
MariaDB [(none)]> create database cacti;
Query OK, 1 row affected (0.00 sec)
MariaDB [(none)]> GRANT ALL ON cacti.* TO cactiuser@localhost IDENTIFIED BY ‘password’;
Query OK, 0 rows affected (0.00 sec)
MariaDB [(none)]> flush privileges;
Query OK, 0 rows affected (0.00 sec)
MariaDB [(none)]> exit
Bye
Test the username and password on “cacti” database.
tux@labucs1:/$ mysql -u cactiuser -p cacti
Enter password:
Welcome to the MariaDB monitor. Commands end with ; or \g.
Your MariaDB connection id is 35
Server version: 10.0.38-MariaDB-0ubuntu0.16.04.1 Ubuntu 16.04
Copyright (c) 2000, 2018, Oracle, MariaDB Corporation Ab and others.
Type ‘help;’ or ‘\h’ for help. Type ‘\c’ to clear the current input statement.
MariaDB [cacti]>
8. Update Timezone
sudo vi /etc/php/7.0/apache2/php.ini
Sample Output:
tux@labucs1:/$ sudo vi /etc/php/7.0/apache2/php.ini
memory_limit = 512M
max_execution_time = 60
date.timezone = Asia/Singapore
Do the same thing for /etc/php/7.0/cli/php.ini
sudo vi /etc/php/7.0/cli/php.ini
tux@labucs1:/$ sudo vi /etc/php/7.0/cli/php.ini
memory_limit = 512M
max_execution_time = 60
date.timezone = Asia/Singapore
Restart Apache service to take effect
sudo systemctl restart apache2
Sample Output:
tux@labucs1:/$ sudo systemctl restart apache2
9. Install Cacti (there are two ways , you can either download and extract the tarball file from the official website, or install using the apt install). I recommended doing Method 1.
Method 1:
a. Download the latest version using “wget” command
wget https://www.cacti.net/downloads/cacti-latest.tar.gz
Sample Output:
tux@labucs1:~$ wget https://www.cacti.net/downloads/cacti-latest.tar.gz
–2021-02-21 14:21:00– https://www.cacti.net/downloads/cacti-latest.tar.gz
Resolving www.cacti.net (www.cacti.net)… 172.67.196.107, 104.21.21.50, 2606:4700:3031::ac43:c46b, …
Connecting to www.cacti.net (www.cacti.net)|172.67.196.107|:443… connected.
HTTP request sent, awaiting response… 200 OK
Length: 29197220 (28M) [application/octet-stream]
Saving to: cacti-latest.tar.gz
cacti-latest.tar.gz 100%[==============================================>] 27.84M 961KB/s in 6m 33s
2021-02-21 14:27:38 (72.5 KB/s) – cacti-latest.tar.gz saved [29197220/29197220]
b. Move the file to your Apache Document Root e.g. (/var/www/html)
sudo cp cacti-latest.tar.gz /var/www/html/
c. Extract the file. Rename to Cacti folder
sudo cd /var/www/html
sudo tar -zxvf cacti-latest.tar.gz
sudo mv cacti-1* cacti
Method2: (Install using the “apt install”, I won’t discuss this further)
sudo apt install cacti
Sample Output:
tux@labucs1:/var/www/html$ sudo apt install cacti
The following additional packages will be installed:
dbconfig-common dbconfig-mysql javascript-common libjs-jquery libjs-jquery-cookie libjs-jquery-ui
libjs-jquery-ui-theme-ui-lightness libphp-adodb
Suggested packages:
moreutils libjs-jquery-ui-docs php-adodb
The following NEW packages will be installed:
cacti dbconfig-common dbconfig-mysql javascript-common libjs-jquery libjs-jquery-cookie libjs-jquery-ui
libjs-jquery-ui-theme-ui-lightness libphp-adodb
0 upgraded, 9 newly installed, 0 to remove and 3 not upgraded.
Need to get 3,379 kB of archives.
After this operation, 11.8 MB of additional disk space will be used.
Do you want to continue? [Y/n]
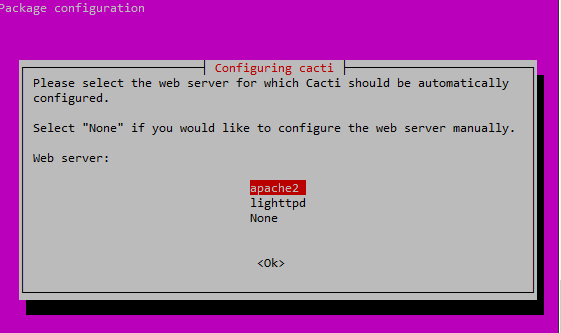
(You will be prompted with a menu-based installation like this, Choose Apache2)
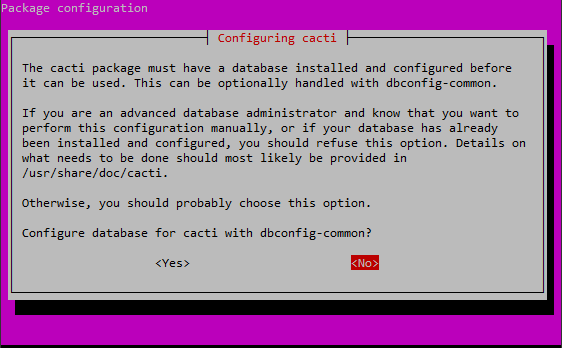
As we already created the “cacti” database earlier, Select “No” for manual config.
Finish Installation (Sample Output below)
Setting up cacti (0.8.8f+ds1-4ubuntu4.16.04.2) …
dbconfig-common: writing config to /etc/dbconfig-common/cacti.conf
Creating config file /etc/dbconfig-common/cacti.conf with new version
Creating config file /etc/cacti/debian.php with new version
dbconfig-common: flushing administrative password
Creating config file /etc/apache2/conf-available/cacti.conf with new version
Creating config file /etc/lighttpd/conf-available/20-cacti.conf with new version apache2_invoke: Enable configuration cacti
tux@labucs1:~$
10. Configure SNMP
a. Comment out to enable loading of MIBs
sudo vi /etc/snmp/snmp.conf
tux@labucs1:~$ sudo vi /etc/snmp/snmp.conf
[sudo] password for tux:
From:
# As the snmp packages come without MIB files due to license reasons, loading
# of MIBs is disabled by default. If you added the MIBs you can reenable
# loading them by commenting out the following line.
mibs :
To:
# As the snmp packages come without MIB files due to license reasons, loading
# of MIBs is disabled by default. If you added the MIBs you can reenable
# loading them by commenting out the following line.
#mibs :
b. Configure SNMP community. Disable the public community and configure your own Read-only SNMP community
sudo vi /etc/snmp/snmpd.conf
Sample Output:
tux@labucs1:~$ sudo vi /etc/snmp/snmpd.conf
From:
# Default access to basic system info
rocommunity public default -V systemonly
# rocommunity6 is for IPv6
rocommunity6 public default -V systemonly
To:
# Default access to basic system info
# rocommunity public default -V systemonly
# rocommunity6 is for IPv6
# rocommunity6 public default -V systemonly
rocommunity Fr33L1nuXTut0r14L5 localhost
c. Restart SNMP service for changes to take effect
sudo systemctl restart snmpd
Sample Output:
tux@labucs1:~$ sudo systemctl restart snmpd
tux@labucs1:~$
Verify if SNMP is working:
sudo snmpwalk -v2c -c “your SNMP community” localhost system
Sample Output:
tux@labucs1:~$ sudo snmpwalk -v2c -c Fr33L1nuXTut0r14L5 localhost system
SNMPv2-MIB::sysDescr.0 = STRING: Linux labucs1 4.4.0-169-generic #198-Ubuntu SMP Tue Nov 12 10:38:00 UTC 2019 x86_64
SNMPv2-MIB::sysObjectID.0 = OID: NET-SNMP-MIB::netSnmpAgentOIDs.10
DISMAN-EVENT-MIB::sysUpTimeInstance = Timeticks: (8607) 0:01:26.07
SNMPv2-MIB::sysContact.0 = STRING: Me <me@example.org>
SNMPv2-MIB::sysName.0 = STRING: labucs1
11. Configure the Cacti Server
a. Import mysql database schema
sudo mysql -u root -p cacti < /var/www/html/cacti/cacti.sql
b. Backup config file
sudo cp /var/www/html/cacti/include/config.php /var/www/html/cacti/include/config.php.ORIG
c. Edit Cacti config file for MySQL database information
sudo vi /var/www/html/cacti/include/config.php
Sample Output:
* Make sure these values reflect your actual database/host/user/password
*/
$database_type = ‘mysql’;
$database_default = ‘cacti‘;
$database_hostname = ‘localhost‘;
$database_username = ‘cactiuser‘;
$database_password = ‘password‘;
$database_port = ‘3306’;
$database_retries = 5;
$database_ssl = false;
$database_ssl_key = ”;
$database_ssl_cert = ”;
$database_ssl_ca = ”;
d. Change directory ownership and permission
sudo chown -R www-data:www-data /var/www/html/cacti/
sudo chmod -R 775 /var/www/html/cacti/
e. Modify crontab to poll every 5 minutes
sudo vi /etc/cron.d/cacti
Add the following (save and quit)
*/5 * * * * www-data php /var/www/html/cacti/poller.php > /dev/null 2>&1
f. Configure the cacti.conf for Apache, and use the following configuration
sudo vi /etc/apache2/sites-available/cacti.conf
To add in /etc/apache2/sites-available/cacti.conf (save and quit)
Note: (You can add something like
“Require ip 192.168.15.16/29” instead of “Require all granted”
or “Allow from 192.168.15.21” instead of “Allow from all”
to only allow specific IP or IP ranges.
Alias /cacti /var/www/html/cacti
<Directory /var/www/html/cacti>
Options +FollowSymLinks
AllowOverride None
<IfVersion >= 2.3>
Require all granted
</IfVersion>
<IfVersion < 2.3>
Order Allow,Deny
Allow from all
</IfVersion>AddType application/x-httpd-php .php
<IfModule mod_php.c>
php_flag magic_quotes_gpc Off
php_flag short_open_tag On
php_flag register_globals Off
php_flag register_argc_argv On
php_flag track_vars On
# this setting is necessary for some locales
php_value mbstring.func_overload 0
php_value include_path .
</IfModule>DirectoryIndex index.php
</Directory>
g. Enable the Virtual Host created using this command
sudo a2ensite cacti
h .Restart Apache service for changes to take effect
sudo systemctl restart apache2
Additional Note: You can inspect the logs for troubleshooting using this command.
sudo tail -f /var/log/apache2/error.log
i. Create log file and change ownership to “www-data”
sudo touch /var/www/html/cacti/log/cacti.log
sudo chown -R www-data:www-data /var/www/html/cacti/log/cacti.log
(Sample output of cacti.log)
tux@labucs1:~$ tail /var/www/html/cacti/log/cacti.log
2021-02-22 11:55:02 – SYSTEM STATS: Time:1.2776 Method:cmd.php Processes:1 Threads:1 Hosts:1 HostsPerProcess:1 DataSources:5 RRDsProcessed:5
2021-02-22 12:00:02 – SYSTEM STATS: Time:1.3062 Method:cmd.php Processes:1 Threads:1 Hosts:1 HostsPerProcess:1 DataSources:5 RRDsProcessed:5
12. Setup Cacti
a. Go to the URL to start the installation of Cacti.
http://your.server.I.P/cacti
You will see something like.
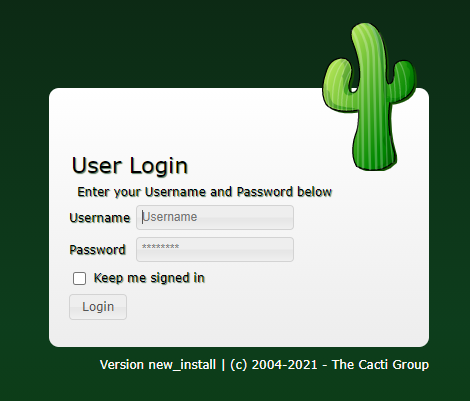
b. Login
username: admin
password: admin

c. You will be prompt with password. Change accordingly.

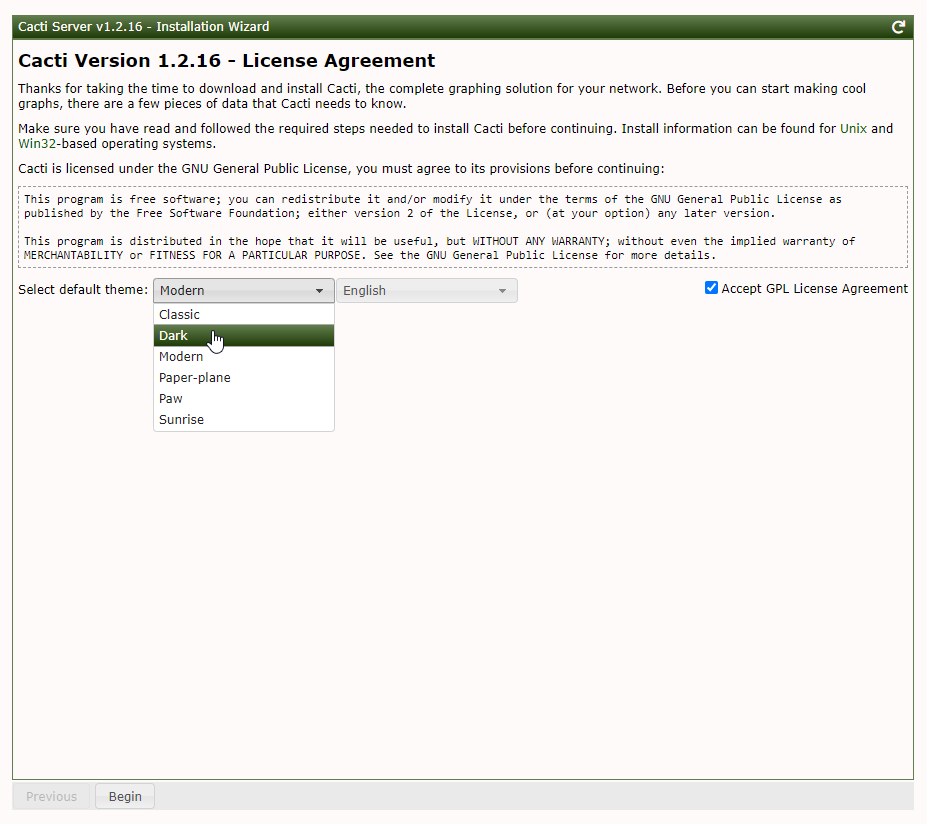
d. Accept GPL License Agreement, you can select default theme as per liking.
e. Pre-installation checks and will suggest recommendations. Fix accordingly.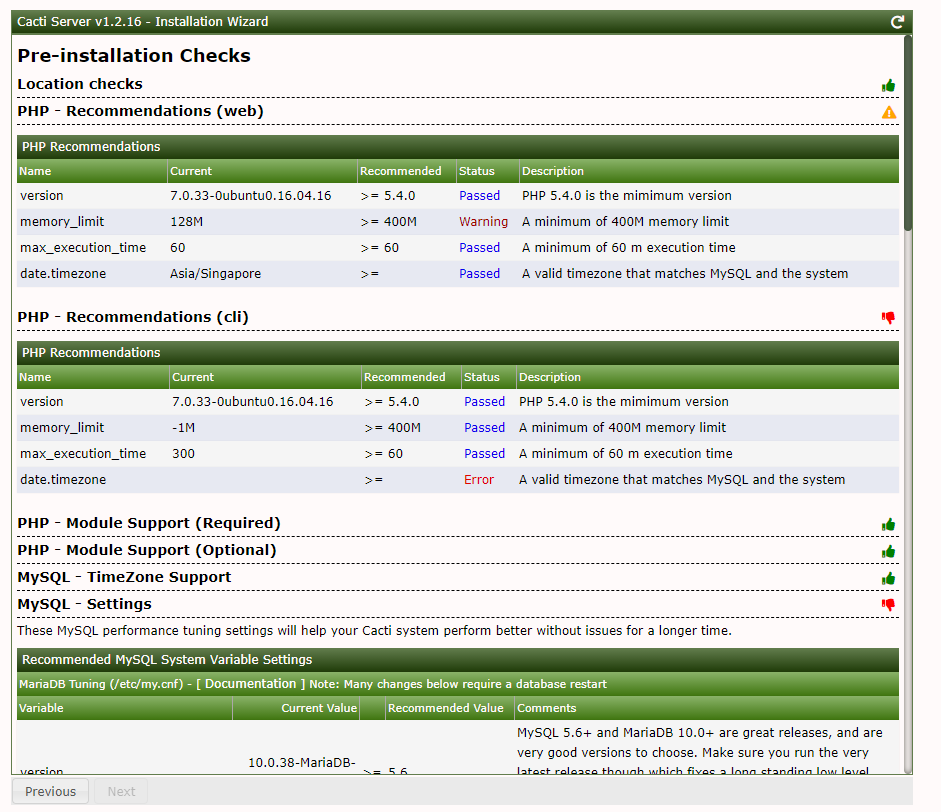
Once fixed, you will see something like this:

f. Select “New Primary Server” and click Next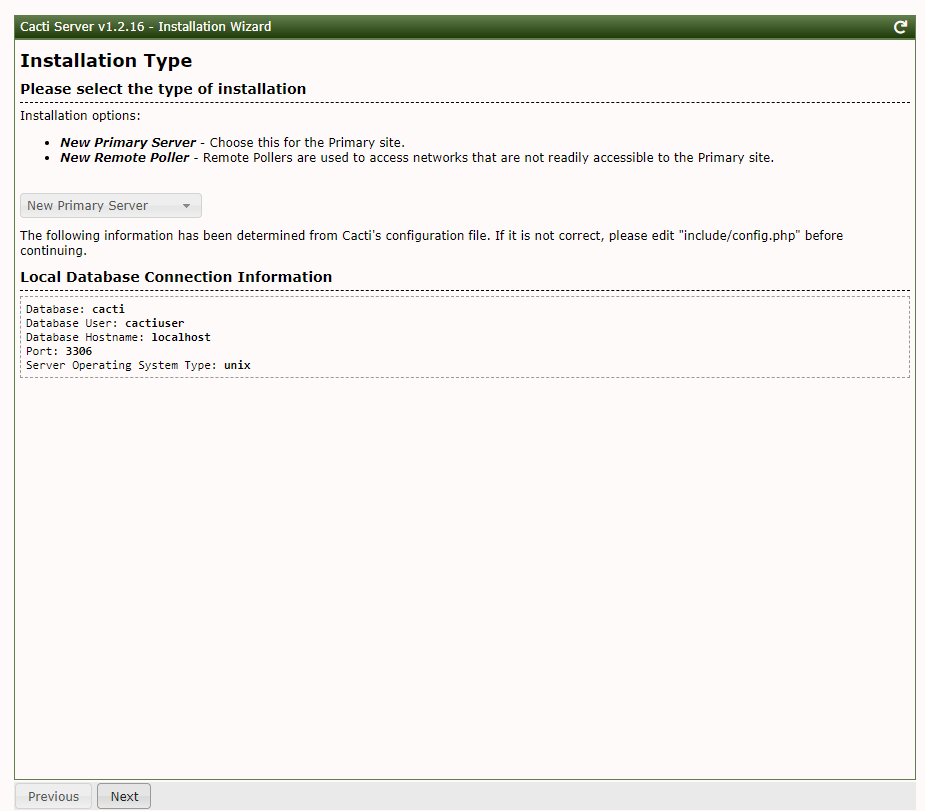
g. Directory permission Checks, click Next.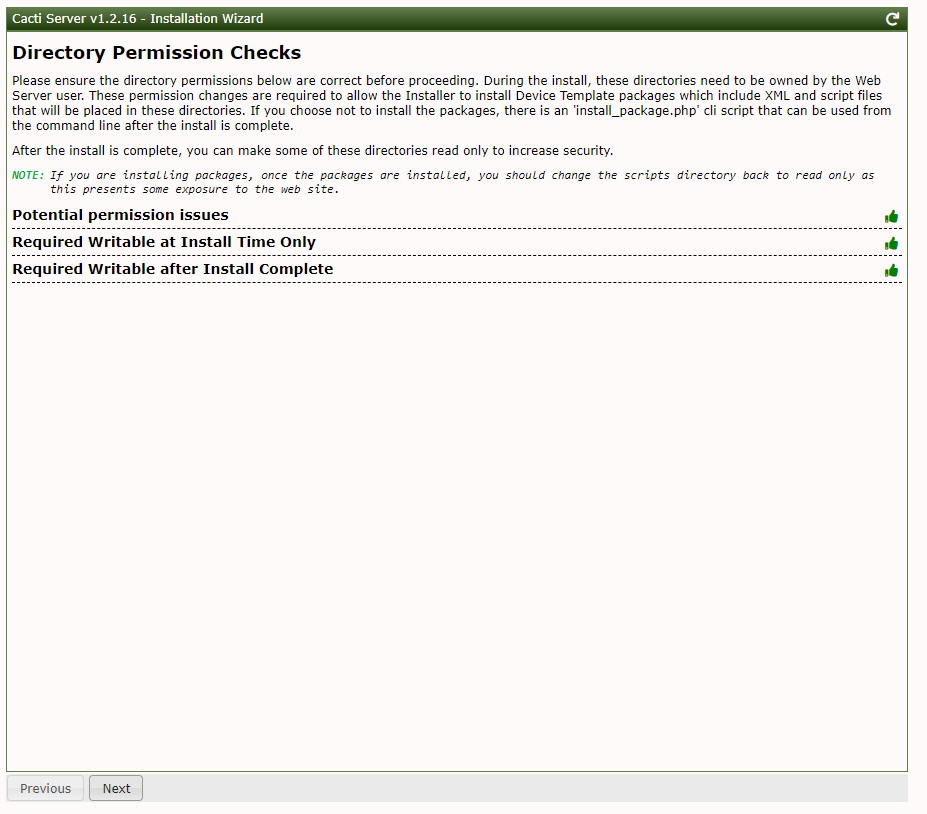
h. Critical binary locations and Versions page to see if there’s any missing. Click Next if no issue.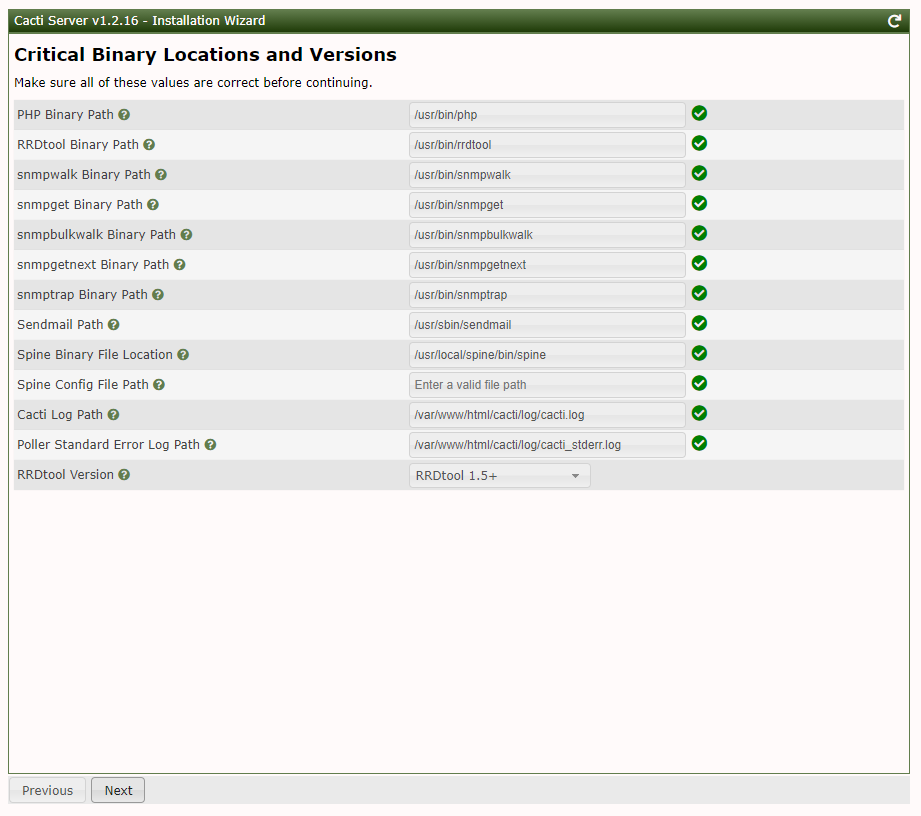
i. Input validation Whitelist Protection page, click “I have read this statement” and click Next.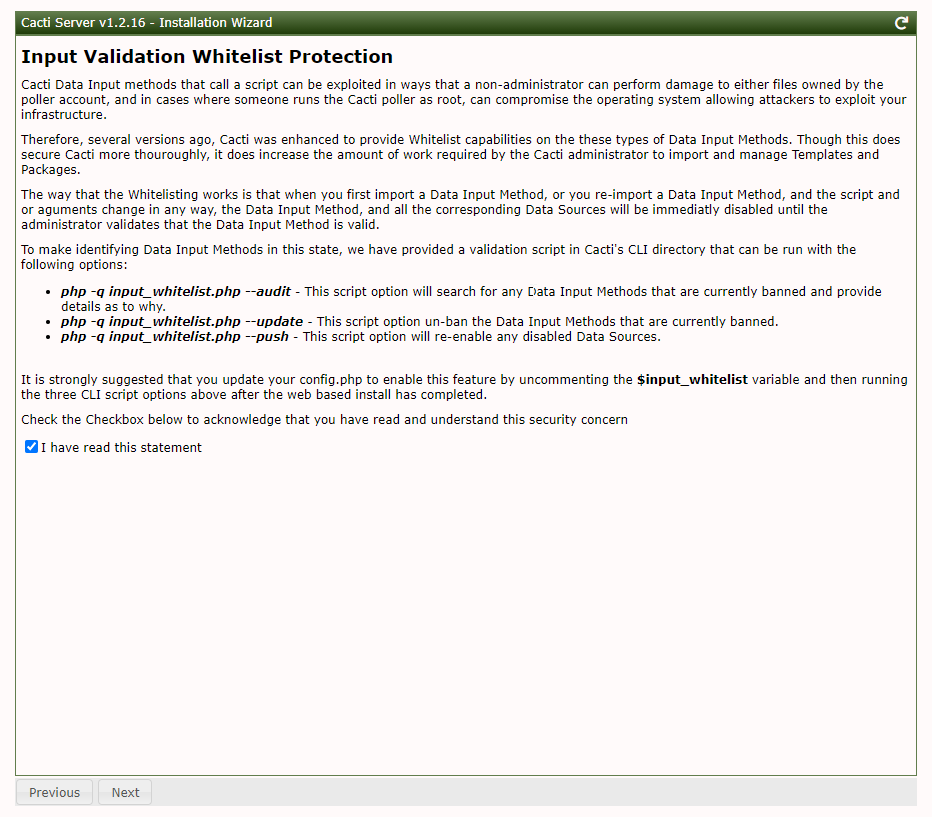
j. Default profile page, you can select 5 minutes for collection and cron interval. You can also input the Network Range to work out the range of IPs to be scanned.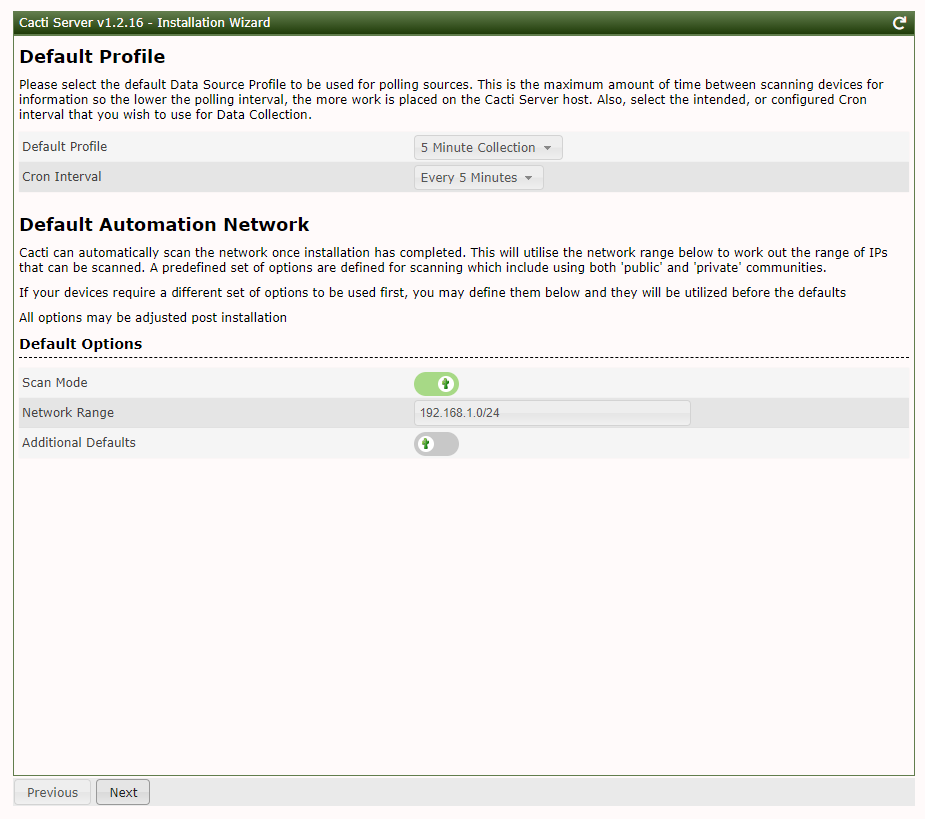
k. Template Setup page info. Click Next.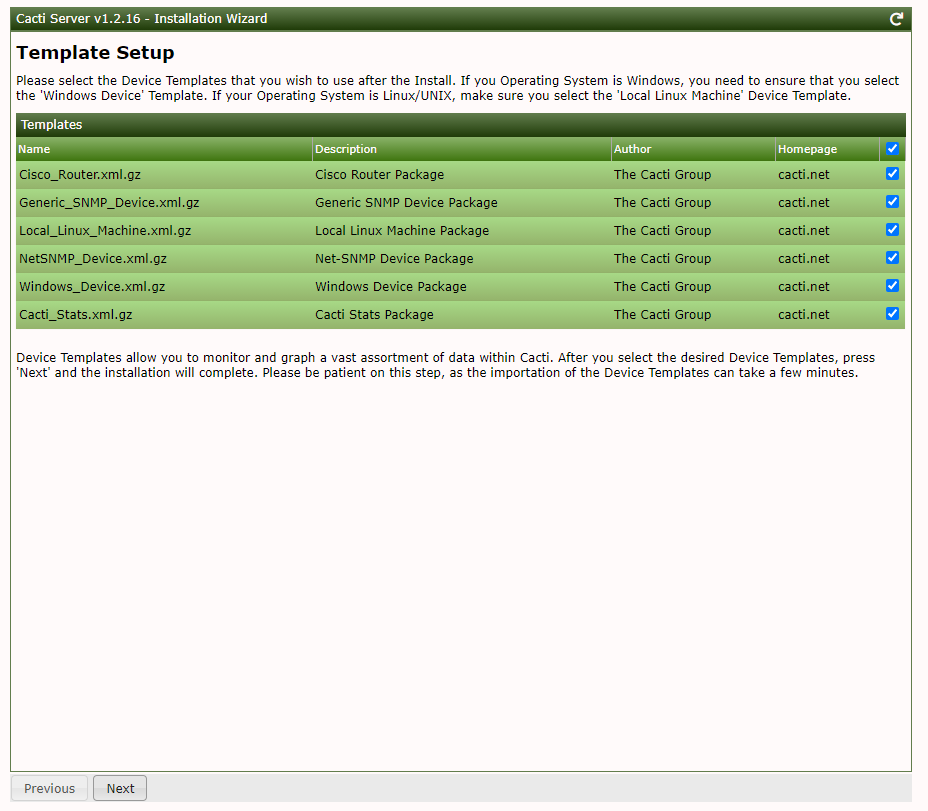
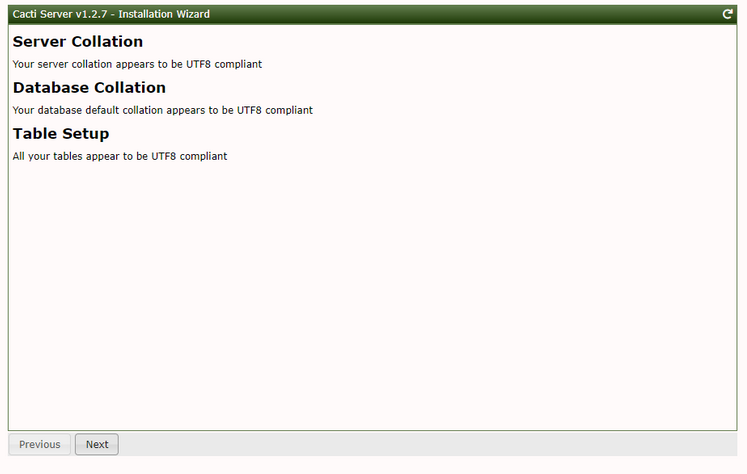
l. Server Collation Page. Fixed the Warning as per instructed.
Sample how to fix this ( I will not cover further about this because it can be different “Warning” message for other installation)
MariaDB [(none)]> ALTER DATABASE cacti CHARACTER SET utf8mb4 COLLATE utf8mb4_unicode_ci;
Query OK, 1 row affected (0.00 sec)
MariaDB [(none)]>exit
tux@labucs1:/etc/apache2/sites-enabled$ sudo systemctl restart mysql
tux@labucs1:/etc/apache2/sites-enabled$
Once fixed, you will see something like this.
m. Select “Confirm Installation”, and click Install.
n. Installation Wizards look like this. Once done, click “Get Started”.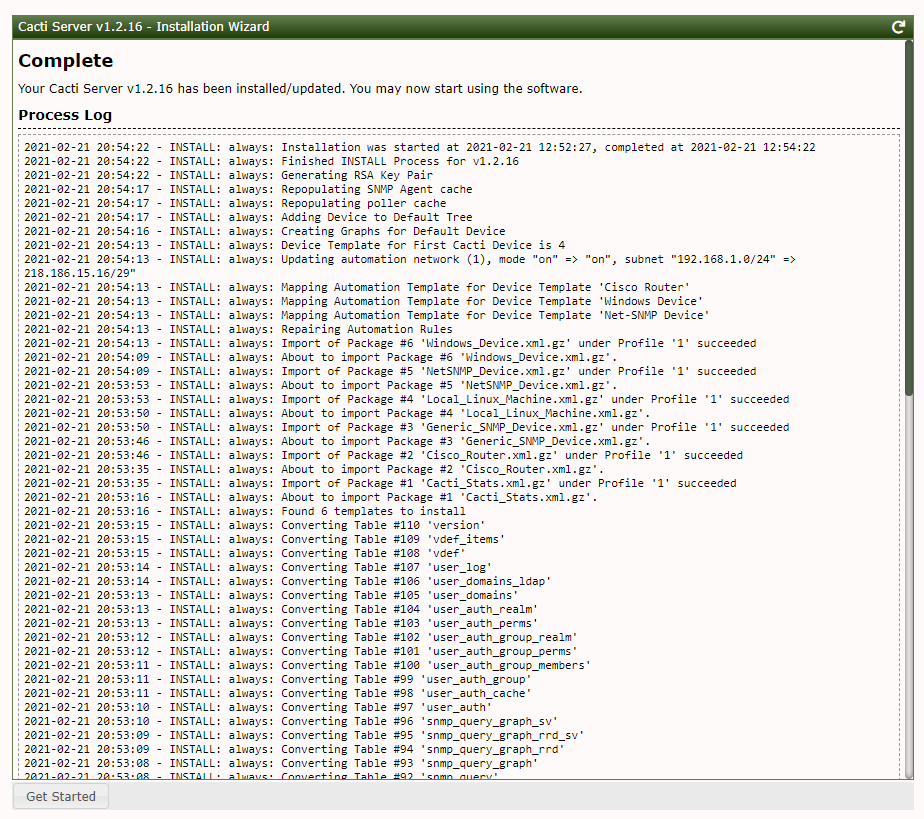
13. Go to Cacti Dashboard. Login using “admin” and your password (Step 12.c)
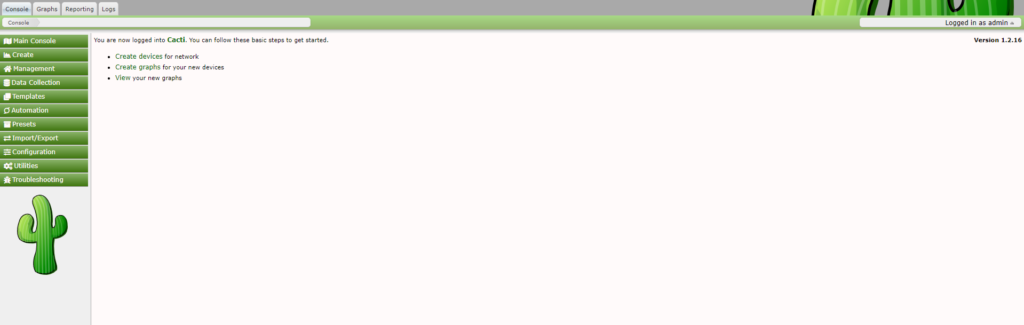
See sample graph by accessing Graphs > Default Tree > Local Linux Machine. This is your own Cacti server monitoring and performance data.
